When it comes to protecting and beautifying your home, vinyl siding is a popular choice for many homeowners. Not only does it provide an attractive exterior appeal, but it also helps shield your house from weather damage and wear. However, there may come a time when you need to customize the siding. Whether it’s to make repairs, install new fixtures or vents, or replace damaged pieces, knowing how to cut vinyl siding correctly is a crucial skill here.
In the guide below, you’ll learn everything you need to know about how to cut vinyl siding like a pro. We’ll discuss the right tools to use, tips for proper measuring and marking, and provide clear, detailed instructions on making clean, straight cuts.
Why You Might Need to Cut Vinyl Siding
In general, there are a few common situations where you may need to cut or alter your vinyl siding:
- Repairs – Life happens. Storms can blow through, tree branches can fall, and accidents with the lawnmower are bound to occur. If a piece of your siding gets damaged, you’ll likely need to trim a replacement section to size to swap in for the busted part.
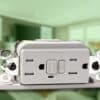
- Installations – Want to add a new dryer vent, electrical outlet, or hose tap to your exterior wall? You’ll need to cut an opening in the siding for these installations to fit properly. The same applies when putting in new windows or doors. Carefully measuring and cutting openings in the vinyl ensures your new additions integrate seamlessly.
- Customization – Vinyl siding can be adapted in creative ways. You can trim pieces to produce unique decorative vent patterns, work around rounded exterior architecture, or simply put your stamp on your home’s aesthetic. Custom cutting lets you make the exterior your own.
The key is to cut the vinyl cleanly and accurately whenever you make changes. Ragged, uneven cuts can allow water intrusion and damage over time. Learning proper siding cutting technique is crucial to maintaining the siding’s weatherproofing while achieving the look you want.

Tools and Materials Needed
Cutting vinyl siding doesn’t require a garage full of fancy tools. However, these basic tools will help make the process smooth and simple:
- Vinyl Siding Cutter – This specialized tool has a sharp blade guarded by a guide to help you make straight, clean cuts. Models like the Malco TurboShear are affordable and easy to control.
- Utility Knife – A standard utility knife with a new sharp blade can cut through vinyl siding in a pinch. Replace the blade often for best results.
- Snips – Aviation snips (or tin snips) allow you to cut through vinyl siding by hand. Look for compound leverage models, which give you more cutting power.
- Measuring Tape – Accurately measuring cuts is crucial. A standard 25-foot tape measure will do the trick.
- Level – Checking vertical cuts are plumb is important. A small spirit level will help get this right.
- Marking Pencil – Choose a pencil with soft, thick lead (like a carpenter’s pencil) to clearly mark your lines.
- Safety Gear – Protect yourself with gloves, eye protection, and a dust mask when cutting vinyl siding.
Get Set Up for Success
Before you start cutting, take a few minutes to get set up properly. This will help the job go more smoothly and result in clean, accurate cuts.
First, pick a good spot to work. Choose a flat surface like a driveway or patio—stay off the grass, as it’s uneven. Make sure you have plenty of space to maneuver the vinyl siding pieces around. Sweep the area to clear any debris.
Next, get your tools prepared and within reach. Pop a fresh blade in your utility knife or vinyl siding cutter. Have your snips, measuring tape, marking pencil, and safety gear nearby and ready to go. Nobody likes searching for tools mid-project!
Now, take a look at the measurements for the cuts you’ll need to make. Try to visualize how you’ll make each cut before starting. Understanding the full scope of the job upfront makes it easier to stay efficient once you begin.
Finally, watch the weather. Avoid cutting vinyl siding in freezing temperatures—it can become brittle. Optimal conditions are warm to moderate temps with low wind. With those tips in mind, you’re primed for success!
How to Cut Your Vinyl Siding
Okay, you’ve prepped your workspace, gathered your supplies, and are ready to start cutting vinyl siding like a pro. Follow these step-by-step instructions closely and you’ll be able to make clean, accurate cuts that look seamless. Having the right technique here is key to getting professional results you’ll be satisfied with. Don’t rush through it—take your time and do each step carefully. Here’s how to do it:
1) Measure twice, cut once – Using your measuring tape, carefully measure and mark where you need to cut. Double-check your measurements – accurate marking is crucial.
2) Mark your cut line – Take your marking pencil and draw a clear line along the measured cut mark. Use heavy pressure so the line is easy to follow.
3) Clamp it down – Secure the siding with clamps on a stable surface before cutting to prevent vibrations. Use C-clamps or spring clamps.
4) Choose your cutter – A vinyl siding cutter is ideal, but you can also use snips or a utility knife in a pinch.
5) Position your cutter – Place the cutter blade on the siding above the pencil line – this prevents splintering on the underside edge.
6) Cut confidently. In one smooth, steady motion, press down firmly and run the cutter along the cut line. Let the tool do the work.
7)Inspect the cut– Examine the cut line – it should be straight and clean without jagged edges. Use sandpaper to smooth any minor roughness.
8)Test the fit – Try fitting the freshly cut vinyl siding piece into place to ensure proper measurement before permanently installing.
Tips for a Flawless Finish
You’ve made your vinyl siding cuts skillfully and the hard part is done! Now, add some finishing touches to complete the job:
- Examine the cut edge and sand any minor roughness. Use 120-grit sandpaper and sand lightly. This prevents sharp edges and ensures a smooth custom fit.
- For horizontal cuts, tilt the siding piece and apply vinyl cement/adhesive along the cut edge. This seals the edge and prevents water infiltration.
- Where needed, use vinyl trim pieces to provide a clean, finished look around openings or edges. Match the dimensions properly.
- Make sure cut edges are properly aligned and fitted against existing siding. There should be no large gaps or overlaps.
- When installing the cut siding, nail into the center of the nail slots to allow expansion and contraction. Set nails flush.
- Use a damp cloth to wipe away any metal shavings, filings, or pencil marks left from cutting and installation.
- Paint any exposed nail heads with touch-up paint to match the vinyl siding color. This finishes the job like the icing on the cake.

Other Recommended Maintenance
Caring for your vinyl siding properly is key to keeping it looking fresh and preventing costly repairs down the road. While occasional custom cutting may be needed, you should also integrate vinyl siding care into your regular home maintenance routine.
Be sure to wash it at least once a year using a soft cloth or brush and mild detergent. Avoid abrasive cleaners or high-pressure washers which can damage the siding. Inspect your vinyl siding when you wash it for any cracks, warping, loose panels, or other issues needing attention.
Additionally, check around doors, windows, vents, and outlets for gaps that need re-caulking. Keep trees and shrubs trimmed back so they don’t rub against the siding. Address problems promptly to prevent further damage. With proper installation techniques and regular care, quality vinyl siding will provide lasting beauty and protection for your home’s exterior!
When to Call a Professional
Extensive damage covering large areas of siding will likely require complete replacement. Consequently, this is a big job better suited for an experienced contractor with the right equipment.
Similarly, tricky custom jobs, like working around complex architectures or unusual angles, also often require a pro’s expertise. An installer who does vinyl siding day in and day out will have the skills to handle challenging situations efficiently.
When in doubt, call in a professional for an assessment. They can evaluate the scope of the project and let you know if it’s beginner-friendly or best tackled by a seasoned expert. Look for licensed, insured vinyl siding contractors with strong references and proven experience. Professionals can also spot underlying issues and ensure any repairs blend in seamlessly. While vinyl siding projects are often affordable, don’t be afraid to ask questions upfront and get a detailed plan.
Conclusion
All in all, knowing how to cut vinyl siding can help you achieve the custom look you want for your home’s exterior. Follow these instructions for clean, straight cuts that enhance your siding. Just remember to measure twice, cut once, and work slowly and methodically for satisfying results.
To double-check your siding work or schedule a complete home inspection in Atlanta, GA, and surrounding areas, call or schedule online with Avalon Home Inspections today!